Three Rivers Forge
Art • Business • Preparedness
A place to discuss the King of Trades - blacksmithing.
Interested? Want to learn more about the community?

Learn more first
Anchor Points

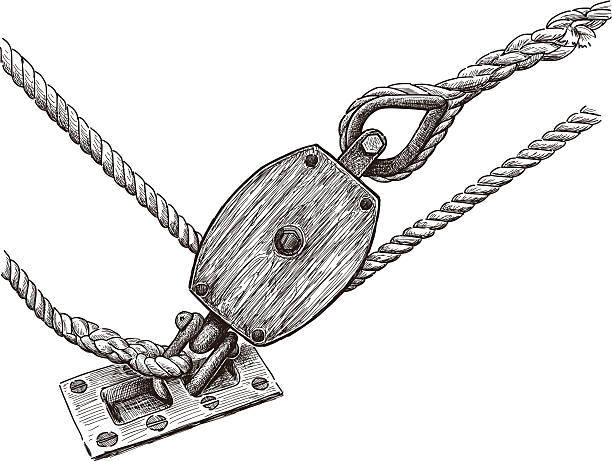
Talking about rope and pulleys, it pays to plan ahead and install anchor points around your shop.

I'm lucky that my main bench weighs half a ton and I can tie off to it even though it's not bolted to the floor. Sadly, it's never in the right position for a simple straight pull!

Abom79, the famous youtube Machinist and all-around great guy, did a video some time back where he made some anchor points he fastened to his concrete slab. Abom was the guy who turned me on to Store Frontier and motivated me to set up my own line of Shop Shirts with them. I owe Adam big time for that one since I wear my TRF shirts almost exclusively.
http://www.storefrontier.com/store/three-rivers-forge

Anyhow, anchor points aren't anything new, but they are something that most folks don't think about... kinda like how they don't think about ropes and pulleys.

With anchors all around the shop, you can quickly and easily move even the heaviest machines you might have. If the anchors don't line up perfectly, all you need to do is run a heavy rope between two of them and fasten a Prusic Loop to the rope. As you slide the Prusic up and down the length of the line, you have a near-infinite number of vectors to pull from. Worst case scenario, you get your load into the right area, then shift your rope to another set of anchors and start pulling the load in the new direction. Eventually, with enough shifting between anchors, you'll get your piece moved to its new home.

As with anything else, be smart. Overbuild your anchors and make sure they are hell for stout. You don't want any weak links in the chain. It's sure to ruin your day if an anchor rips out of the wall while under load!

Interested? Want to learn more about the community?

Learn more first
What else you may like…
Posts
Articles
Ha! Found it!

Somehow, I lost the bookmark for this page and didn't even realize it!

Hope everyone's doing great and had a very Merry Christmas!

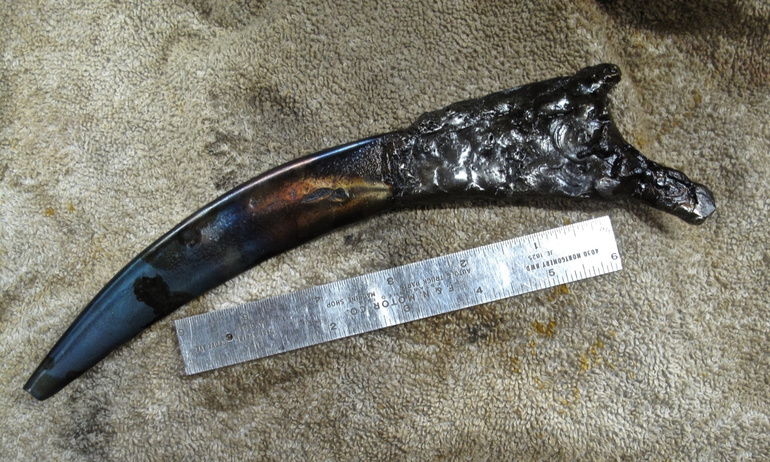
For Sale -- One Genuine Dragon's Fang

It's been a very unusual time since last I posted here, and I can't apologize enough for my absence. Still, the hunt is over and I have a genuine dragon's fang all cleaned up and looking for a new home.

Now, I know you're thinking that this must be something I made... but it's not. Surely, you didn't really think that it was knights in shining armor who laid low all those pesky dragons?

No, my friends, that's just more fake news. Blacksmiths have been the go-to guy for all manner of monster eradication needs. Unfortunately, those prissy knights had the money to burn and the minstrels sure weren't going to bite the hand that feeds them.

Fake News isn't new!

If you think about it logically, why would someone ride off to the nearest castle, hoping there was a knight handy, when the village undoubtedly had a blacksmith.

Aren't blacksmiths already a curmudgeonly lot? Aren't we already used to dealing with irate animals, shodding horses and oxen from sun up to sun down? Dragon's fire? Ha! Try standing in...

Whip It!

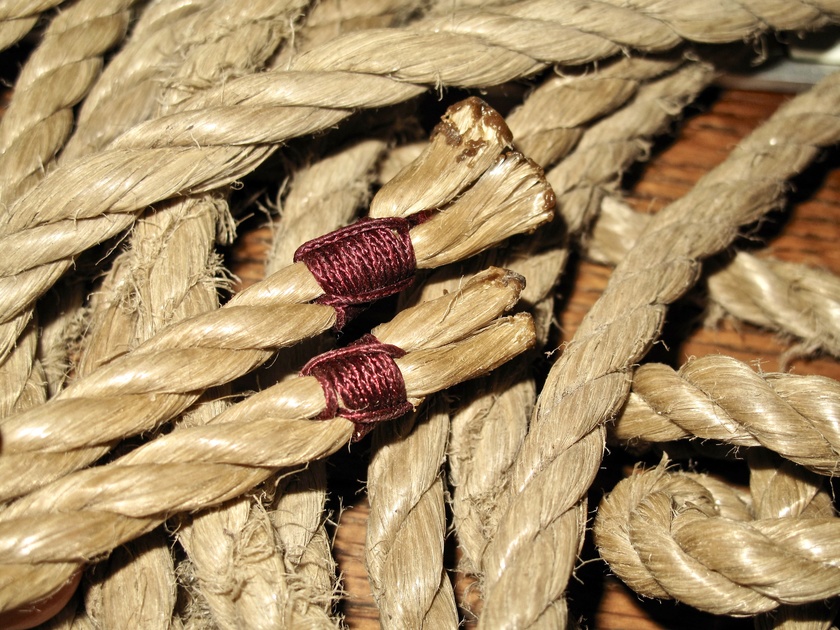
Around the #blacksmith shop, there's always something that needs tending to. In this case, I needed to put a whipping on the end of some lightweight rope that I'll use for lashing things in place.

Even with plastic ropes, you need to whip the ends to maintain the strength of the line.

I know the "butane back-splice" is quick and easy, and I'm not suggesting that you shouldn't melt the ends. The problem is that the blob of melted plastic can break apart with use, and then all of the strands are left to their own devices. In other words, they aren't bound together and working in unison, and that makes the rope weaker.

Plus, whipped ends just look great!

Twisted or woven, always be sure to put a whipping on the ends of your line!

One of the benefits of whipping that's not often discussed is how you can color-code your lines. A red whipping, for example, might only be on ropes that are 12' long. Green thread is on lines that are 25' long.

Why? Well, it's nice to grab a piece of rope and know ...

post photo preview
A Scythe in the Making!

It started life as a 30-gallon drum that was rusted through and crushed.


Cutting the blank out was easy enough with my angle grinder and nibbler, but she still has a long way to go before I can call her a Scythe Proper.

I've been curiuos about scythes for awhile, but never thought about making one since I don't have a power hammer to help ease the work load.  Then I ran across a video on Rob Stephens' channel on Youtube.

Rob's something of a scything guru and posts great videos of him using quite a variety of scythes.  When I saw that one of his "antique" blades was actually made from sheet metal that was riveted to a thicker steel spine.... I was curious.

The Tyvack style of scythe appears to be a late-comer to the industry.  While traditional blades are forged from a big bar and have a cross-section that tapers from spine to edge, the folks at Tyvack opted to use sheet metal for the majority of the body.

Without seeing an original blade in person, all I can do is guess and hope.  The thickness of the drum's body mighty be too thin, but it'll work well enough for a prototype.

What did impress me is how fast the blade stiffened up when I started tensioning it with my cross-peen.  You wouldn't think those little divots would make much of a difference, but they sure do!

My design differs from the Tyvack blades I've seen online in that it's cupped.  While I wanted to keep it flat like I'd seen in my research, it quickliy became apparent that I'd cut the blank out too wide for as thin as the steel sheet is.

If I'd made the blank only about 2" from spine to edge, the thickness of the metal might have been good enough.  Going wider like I did, though, allowed for too much flop.

The good news is that I can always trim the blade down.  Without the spine on it, I'm just guessing at how she'll perform.  If after the spine's riveted in place I see that she's hellfurstout enough, I could slim the whole design a bit just to play around with different configurations.

No matter what, this is going to be what you call a "grass blade".  There's not enough mass in the body to stop it from simply crunching if I hit a rock or woody stem in something, so there'll be no ditch clearing in her future!



Read full Article
Available on mobile and TV devices
google store google store app store app store
google store google store app tv store app tv store amazon store amazon store roku store roku store
Powered by Locals